IndeaYoga Shala | Ashtanga Yoga Classes

29
SEP
Finding Balance Upside Down: Sirsasana / Headstand
Have you ever just watched someone doing a headstand and wondered, “How do they manage to balance like that?”
In this blog, we are going to help you find your balance upside down, one step at a time.
Understanding the "King of Asanas"
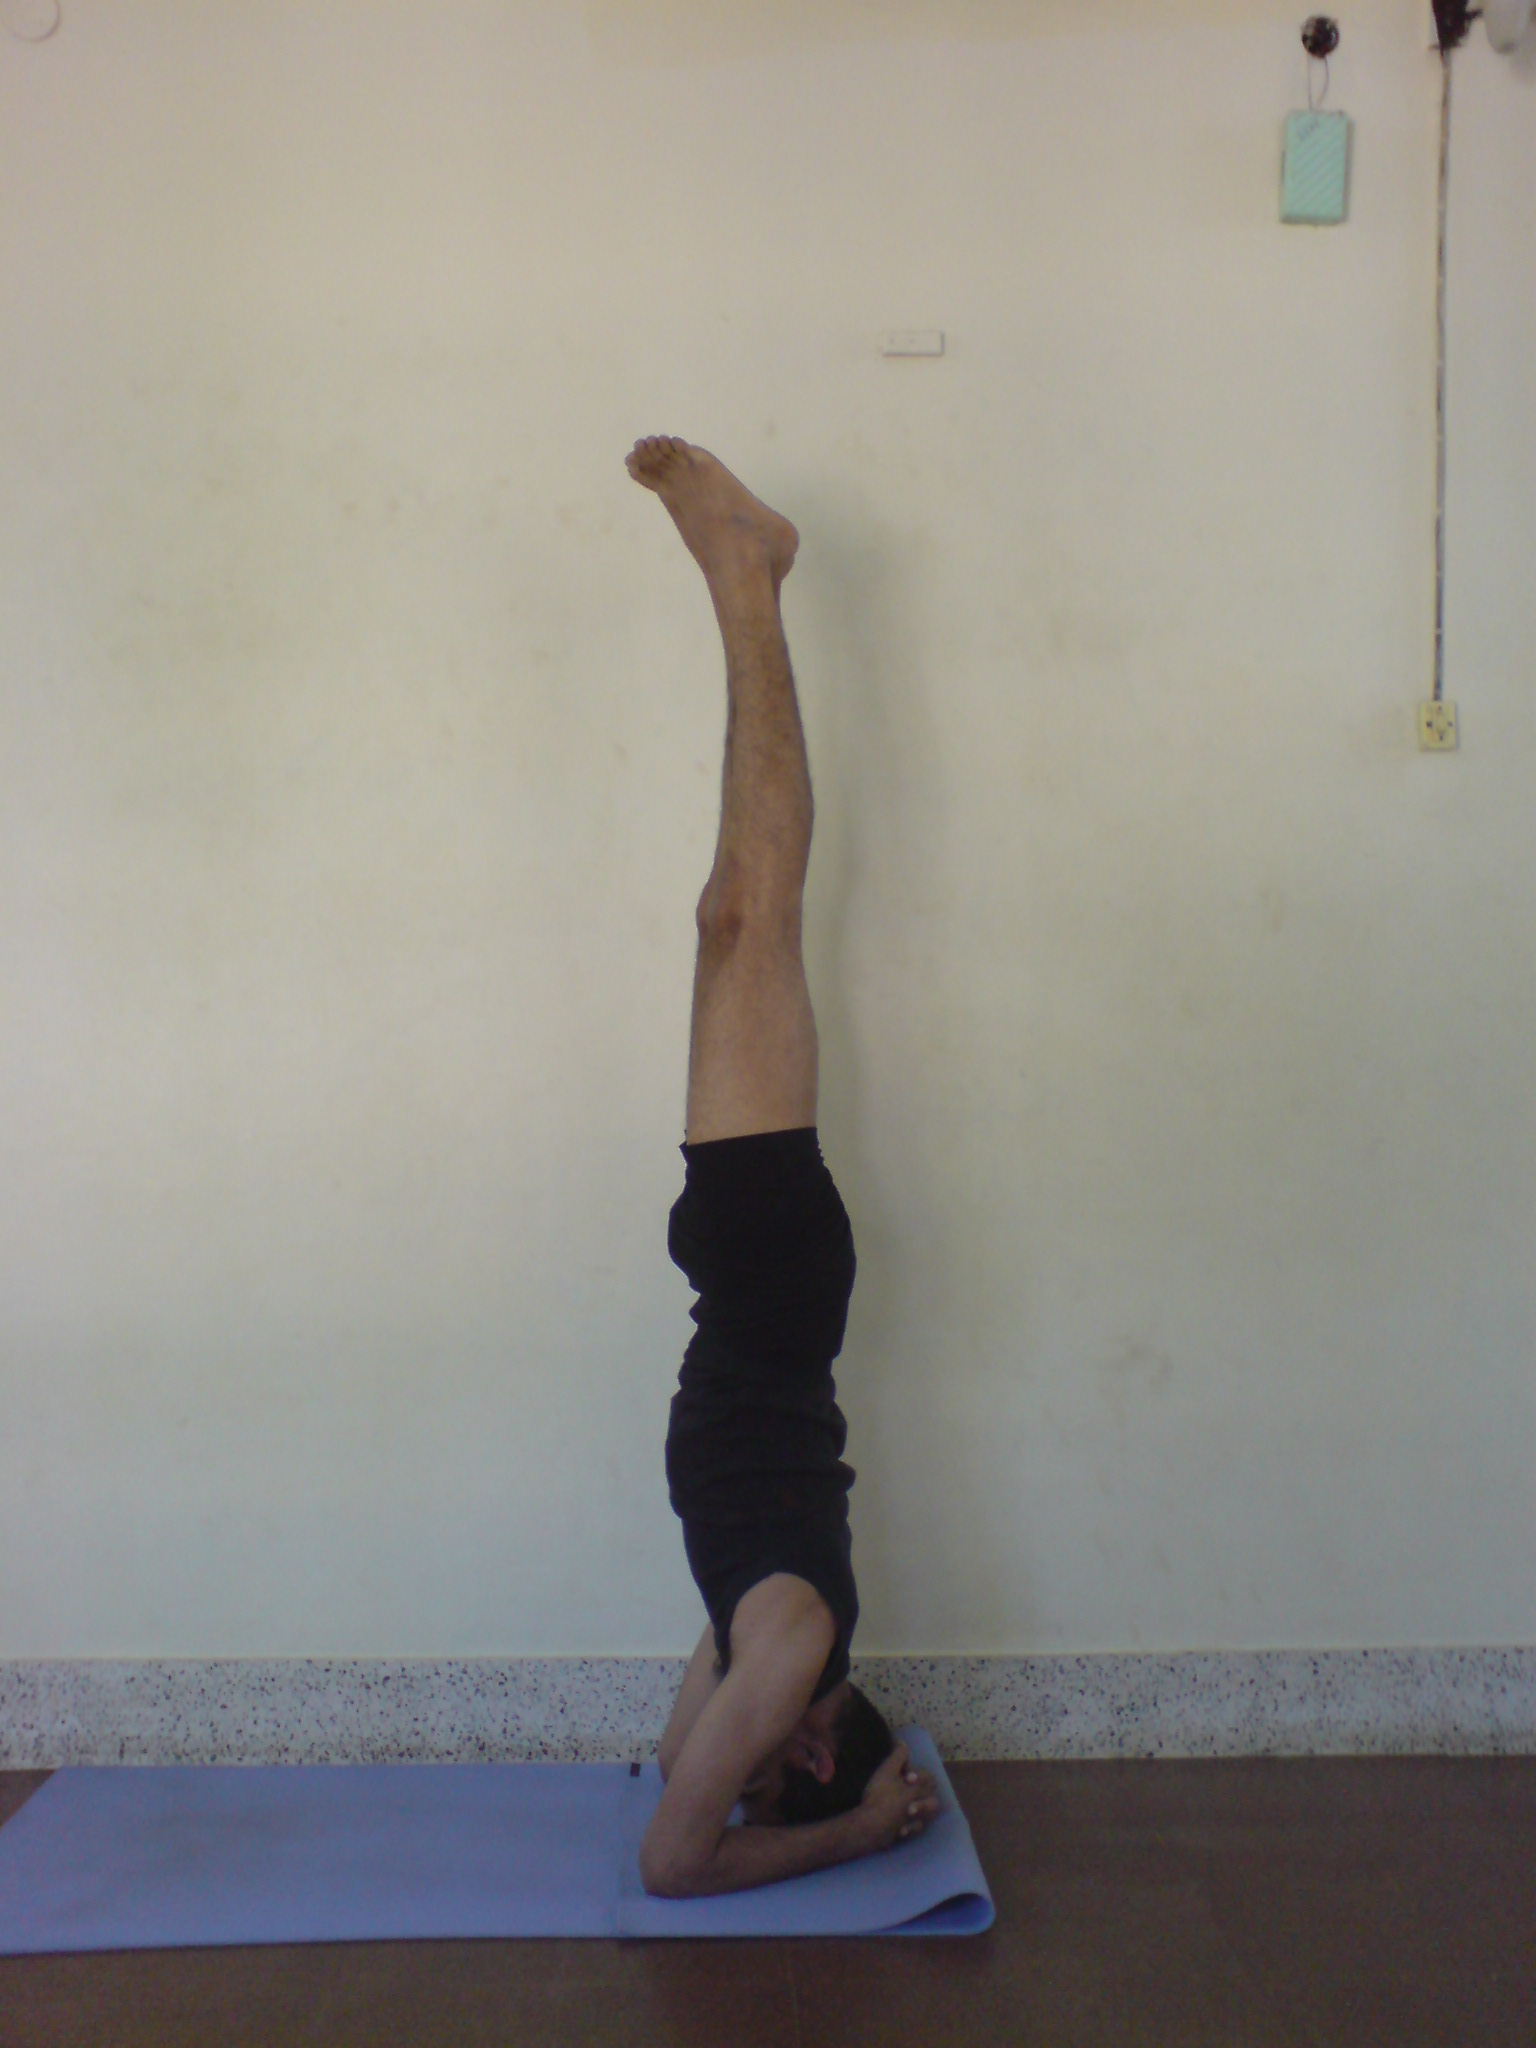
Sirsasana / Shirshasana, also commonly known as headstand, is often called “The King of Asanas”. As master yogis like B.K.S. Iyengar noted in his book ‘Light on Yoga’, “The ancient books have called sirsasana the king of asanas, and the reasons are not hard to find”. He explains that just like a nation needs a king or a constitutional head to guide it, the human body also needs the brain housed within the skull to guide it. Regular practice of Sirsasana encourages blood flow to the brain, supporting the nourishment of the brain and the organs located within the head. This is one of the reasons as to why the asana is traditionally considered as extremely beneficial.
Ready to turn yourself upside down? Let’s see what it really takes to get there. Don’t worry, we aren’t going to throw you straight into it. Let’s take it slow & steady, one step at a time.
Step 1: Fold and prepare the mat well, ensuring that there is sufficient support for the head. Sit on your knees and measure your distance from the knee to your wrist. It should be about a forearm’s distance or closer. Interlock your fingers well, tucking the little finger in. Pressurise the wrists. Lift your shoulders, creating a space between the neck and shoulders; ensure the neck is free. Press down your elbows, forearms, and wrists, forming a “triangle” or an inverted “V”. Hold this position for 15 to 30 seconds.
Step 2: Tuck the toes under, raise up on the knees and place the crown of the head on the mat in between your palms. Wrists should grip the sides of the head. Hold for 15 to 30 seconds.
Step 3: As you lift your knees, straightening your legs, move your trunk forward. The back should be kept as straight as possible. Work towards lifting the trunk upwards and transferring the body weight onto your arms by gradually moving the toes forward. Hold for 30 to 45 seconds.
Step 4: Lift the legs off the floor one by one by bending the knees. Strongly contract your abdominal muscles and keep the knees as close to the trunk as possible. Hold for around 30 to 60 seconds.
Step 5: Work on straightening one leg at a time, keeping the other knee tucked tightly in the abdomen. Keep pressing the arms, wrists, and elbows down, while keeping the shoulders lifted. 80% of your body weight should initially be on your arms, gradually reducing as you gain confidence in the pose. Once you are comfortable with raising and holding one leg up at a time, you can straighten the bent knee so that both legs are up at the same time. Hold for 30 to 180 seconds.
Step 6 (The Release): To come down, bend the knees and release with control, step by step. Sit with your head down in Shashankasana and then sit in Vajrasana with your eyes closed. Don’t be in a hurry to get up.
Note: Always practice Sarvangasana (Shoulder Stand) as a counter-pose after Sirsasana to combat increased capacity of anger.
Note for teachers :
- While supporting the students to get into sirshasana, always help from behind their back.
Common mistakes :
- Wrists collapsed or raised – wrists must be pressed down, with the weight on forearms & wrists.
- Turning the neck – damages cervical vertebrae.
- Shoulders collapsed – lift the spine & shoulders up.
- Body not straight up – squeeze the buttocks & pull the abdomen in.
- Neck complaints – ensure the weight is on the upper arms & wrists, don’t collapse the shoulders to protect the neck.
- In case of strain on the crown of the head, double the thickness of your mat.
- Elbows are too wide – should be at forearm distance & not move.
Limitations for Headstand (Sirsasana):
- Heart disease – avoid or be very careful.
- Neck problems – Teach preparatory asanas for a good while & then slowly introduce sirshasana.
- Frozen shoulder.
- Menstruation or pregnancy.
- Vertigo.
- Epilepsy.
- Weak eye sight – glaucoma.
- Toxic blood.
- Utitis (ear infection).
- Fever/flu.
Benefits of Headstand (Sirsasana):
- Good for memory.
- Improves head & heart condition.
- Gives relief to the cardiovascular system.
- Good for respiratory problems.
- Improves circulation to the glands.
- Reduces stress.
- Relieves migraine & tension headaches.
- Good for constipation.
- Strengthens the spine.
- Gives energy.
Watch the videos below to master Sirsasana.